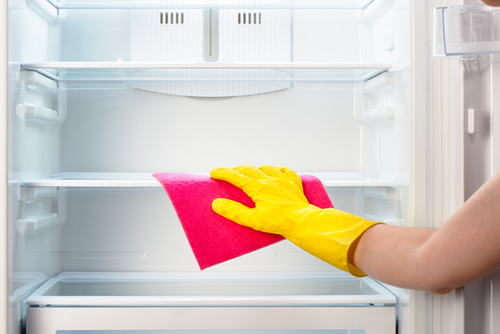
As housekeeping goes, fridge cleaning is one of the most formidable tasks of them all. One of the reasons why it’s so time-consuming is the fact that most people don’t do it so often and when they do decide to tackle this chore, there’s a lot of caked on-dirt and spills to tackle.
This is especially the case if you’re moving into a new home that already has a fridge in it that hasn’t been tidied up in awhile. While most people in Whittier prefer to outsource this task to reliable house cleaning services, it’s still well-worth a homeowner’s while to learn how to do it on their own.
In the following article, we’ll show you how to take your fridge cleaning – and your food safety – to the next level by providing an easy guide on how to make your refrigerator shine. Read on!
Do I need to turn off the fridge to clean it?

How do you deep clean a refrigerator?
Once you’re done with preparation, you need to follow a couple of simple steps:
Step #1: Remove food
One of the best move-out cleaning tips is to get rid of leftovers. Check the dates on every food package and throw away everything that’s expired. Consider tossing the food that’s close to the expiration date and that you know you won’t be using any time soon. Put the groceries in a cooler to keep them fresh and sanitary until you finish cleaning.
Step #2: Wash shelves and salad crisper drawers
Take out salad crisper drawers and all removable shelves. Check the user manual beforehand to avoid damaging them. Let the drawers and shelves reach room temperature to reduce the risk of shattering and soak them in the solution of hot water and washing liquid. Scrub and rinse them with clean water and let them dry. Use a toothpick to remove the dirt accumulated on the joint between the shelf surface and its surround.
Step #3: Clean up the interior
Wipe the interior with a damp microfiber cloth to remove the hard dust and scrub with a sponge to get rid of dirt and grime. Similar to cleaning the interior of an oven, it’s effective to make a paste from water and baking soda. Apply the paste to the surface, let it sit for 20-30 minutes, and remove it with a clean cloth. This way you’ll also disinfect the fridge.
Step #4: Make the outer surfaces sparkling
Wash the handle and the door to remove the germs that build up from frequent contact with hands. If you have a fridge with a freezer at the bottom, use the crevice vacuum nozzle to pick up the crumbs that have accumulated in the folds of the door seal, or use a stiff, dry washing-up brush.
Step #5: Tackle the coils

Where in Whittier can I find dedicated house cleaning services?
Making your fridge spick-and-span doesn’t have to be an impossible mission. Luckily, Oasis Natural Cleaning is here to help you. Our committed experts provide an array of cleaning services and use eco-friendly products.
Savor an exhibition at Whittier Art Gallery while we whip your home into an immaculate condition. Book our services today!
