Top 7 Ways to Declutter Your Home

Posted by | Household Tips | No Comments

Top 7 Ways to Declutter Your HomeThe benefits of a decluttered home go far beyond aesthetics. A clean, organized space reduces stress, boosts productivity, and can even contribute to better physical health. The task of decluttering can feel overwhelming, especially if you’ve accumulated a lot of possessions over time. However, there is no reason why decluttering your home should turn into a daunting task.

By breaking it down into manageable steps, you can transform your home into a place of sanitation and order. If you want to do a professional job like an expert cleaning service provider in La Mirada, CA, the key is to be consistent, patient with yourself, and remember – your goal is progress, not perfection. Let’s start decluttering!

Where do I start to declutter my home?

Starting the decluttering process can often be the hardest part. It’s best to begin with the easiest area or the area that will have the most impact. For some, this might be the kitchen—often the heart of the home. For others, it could be the living room where you spend most of your time. Alternatively, you might find it easier to start with a smaller, less daunting space like a single drawer or closet. Remember, there’s no ‘right’ place to start. 

The goal is to choose a feasible task that gives you a sense of accomplishment and motivates you to tackle the next area. As you move through each space, use these decluttering strategies to sort, organize, and clean. Before you know it, you’ll see a significant transformation in your home. 

Here are the top seven ways to declutter your home, helping you create a more serene, ordered living environment.

Start small

When you first start decluttering, it’s best not to tackle the entire house at once. Begin with a small space like a drawer, a shelf, or a corner of a room. You’ll feel a sense of achievement, which will motivate you to continue with larger areas.

Follow the “One In, One Out” rule

To prevent clutter from accumulating, adopt the “one in, one out” rule. This means that for every new item you bring into your home, you should get rid of an old one to avoid piling up the stuff you don’t need.

Use the 12-month rule

If you haven’t used an item in the last year and it doesn’t hold significant sentimental or monetary value, it’s probably time to let it go. This rule is particularly useful when sorting through clothes, kitchen utensils, and other household items.

Utilize the four-box method

This method requires four boxes per room, each labeled: “Trash,” “Give Away/Sell,” “Storage,” and “Put Away.” As you go through each item in the room, decide which box it fits into and don’t skip any items. This system ensures that you make the right decision about every single item.

Digitize when possible

If your home is cluttered with documents, photos, or CDs, consider digitizing. There are multiple services available for digitizing photographs, documents, and media, and this can free up a considerable amount of physical space.

Optimize your storage

Make the most of the storage space you have. This could mean adding shelves, using under-bed storage, or employing multi-functional furniture. Keep your belongings organized within your storage spaces so you can easily find what you need.

Make a maintenance plan

Once your home is decluttered, keep it that way. Set aside a few minutes each day for maintenance. This could be as simple as quickly assessing a room each day, putting away items that are out of place, or doing a quick dust and vacuum job.

Who should be my choice of dependable cleaning service in La Mirada, CA?

Where do I start to declutter my home?Whether you need someone to declutter your mess, tidy up your home, or provide deep cleaning service, Oasis Natural Cleaning is the best place to ask. We excel in all types of sprucing up so feel free to contact us and we’ll offer our expertise to:

Schedule an appointment while you’re driving down the Imperial Highway and we’ll have you sorted in no time. With us by your side, you’ll finally be able to enjoy your weekends and make the most of your leisure time. Contact us today!


How to Safely Clean Your Kid’s Toys

Posted by | Household Tips | No Comments

How do you disinfect toys?Children’s toys are an undeniable hotspot for germs and bacteria. In a world where home cleanliness has taken on an even greater significance, it’s crucial to know how to properly take care of your child’s playthings like a disinfecting service specialist in La Mirada, CA. Not only can this help protect your child from harmful germs, but it also ensures the longevity of the toys themselves. However, with a myriad of materials and types of play aids, it may seem challenging to know where to start. Here’s a simple but comprehensive guide on how to disinfect children’s toys effectively and safely.

How do you disinfect toys?

Regular toy cleaning and disinfection are crucial in maintaining a hygienic play environment for your child. The cleaning methods may vary, but the end goal is the same: creating a safe, clean, and fun space for your children to learn, explore, and grow. Now let’s get to work!

Solid plastic toys

These are often the easiest to clean. Simply fill a sink or bucket with warm soapy water and gently scrub the toys using a cloth or soft brush. Rinse them thoroughly and let them air dry. To disinfect, you can wipe them down with a cloth soaked in a solution of 1 tablespoon of bleach to 1 quart of water, or use a disinfecting wipe. Always allow the toys to air dry after disinfecting to let the solution do its job.

Stuffed animals and soft toys

Most soft toys can be cleaned in your washing machine. Check the toy’s care label first to ensure it’s machine washable. Use a gentle cycle with warm water and mild detergent, then tumble dry on low heat or air dry. For those not suitable for machine washing, spot clean with a cloth dampened with soapy water, rinse, then air dry.

Battery-operated or electronic toys

Water and electronics don’t mix, so these toys require a different approach. Begin by removing batteries if possible, then clean the exterior with a cloth dampened in soapy water. For disinfection, use a disinfecting wipe or a cloth lightly sprayed with a bleach solution (follow the same concentration mentioned above). Remember to avoid any openings or battery compartments.

Wooden toys

Wooden toys should not be soaked as it can warp the wood or damage the finish. Instead, wipe them with a cloth dipped in soapy water. Rinse with a damp cloth and dry immediately. Disinfecting wooden playthings can be tricky as bleach can cause discoloring. Instead, consider using a vinegar solution (1 part white vinegar to 4 parts water) as a safer alternative.

Bath toys

Bath toys need special attention due to their damp environment, which can encourage mold growth. Squeeze out as much water as possible after each rinse, and allow them to air dry. Regularly clean bath toys in a solution of 1 cup of white vinegar to 1 gallon of water to disinfect and prevent mold.

Safety guidelines for disinfecting toys

  • Always rinse toys thoroughly after disinfecting to remove any residue.
  • Let the toys air dry completely before handing them back to your child.
  • Keep toys out of your child’s reach during the cleaning and disinfection process.
  • Regular cleaning is generally enough. Disinfection is necessary when a family member is sick, the toy is visibly dirty, or the toy has been shared with children outside your household.

Where can I find reliable disinfecting service in La Mirada, CA?

How to Safely Clean Your Kid's Toys?

Whether you want someone to provide useful tips on expert window wiping, offer assistance with kitchen deep cleanups, or you just need pointers on how to declutter your abode, Oasis Natural Cleaning is the premium team of spiffing up specialists that can accomplish all this and so much more!

Get in touch with our reliable tecnnicians while you’re cruising down Rosecrans Avenue and we’ll extend our helping hand in a prompt and efficient manner to surpass your expectations. Give us a call today!

Deep Clean Your Kitchen in 10 Easy Steps

Posted by | Household Tips | No Comments

How do you deep clean a kitchen step by stepA thorough disinfection of your kitchen is essential for maintaining a hygienic and organized space where you prepare meals and spend time with family and friends. However, the thought of deep cleaning the entire space can be overwhelming. 

The good news is that with a trusted cleaning and disinfecting service in La Mirada, CA, you can have a spotless home and time for yourself and your family. However, being familiar with a systematic approach and a few easy steps has benefits of its own. In today’s article, we’ll outline the easy steps to deep clean your kitchen, ensuring that every nook and cranny is thoroughly disinfected, leaving you with a fresh and inviting culinary haven.

How do you deep clean a kitchen step by step?

This venture requires a systematic approach and attention to detail. Follow these instructions for a sparkling and hygienic space:

Step 1: Declutter and organize

Begin by decluttering your space. Remove items from countertops, cabinets, and drawers, and organize them into categories. Discard expired food, donate unused items, and find designated places for everything. This step will not only make the process easier but also create a more organized and functional kitchen.

Step 2: Dust and wipe surfaces

Using a microfiber cloth or duster, remove dust from all surfaces, including countertops, shelves, cabinets, and light fixtures. Pay attention to hard-to-reach areas like the top of cabinets and the space behind appliances. Wipe down surfaces with a mild solution suitable for the specific material to remove grease and grime.

Step 3: Take care of appliances

Remove all food from the refrigerator and freezer, and disinfect the interior with a mixture of warm water and mild detergent. Wipe down the exteriors, including stovetop, oven, microwave, dishwasher, and toaster, using appropriate products for each. Don’t forget to tackle the inside of the microwave, oven, and dishwasher.

Step 4: Scrub the sink

Give your sink a thorough scrub. Start by removing any dishes and utensils. Sprinkle baking soda or a non-abrasive product in the sink and scrub with a sponge or brush. Pay attention to the faucet, handles, and drain. Rinse the sink thoroughly and wipe it dry to prevent water spots.

Step 5: Wipe down the cabinets and drawers

Empty the contents of your cabinets and drawers, and wipe them down with a damp cloth and mild solution. Pay special attention to sticky spots, spills, and stains. Use a toothbrush or small brush to tend to crevices and hardware. Allow the cabinets and drawers to dry before returning the items.

Step 6: Tackle the stovetop and oven

Tackle the stovetop by removing grates, burners, and knobs. Soak them in warm, soapy water and scrub off any residue. Wipe down the stovetop surface with a suitable solution. For the oven, follow the manufacturer’s instructions for the interior. Remove oven racks and wash them separately. Wipe down the exterior of the oven and knobs.

Step 7: Scrub backsplash and tiles

Use a mild solution and a sponge or cloth to scrub the backsplash and tiles. Pay attention to grout lines, as they can accumulate dirt and grime. A toothbrush can be helpful for dealing with hard-to-reach areas. Rinse with clean water and wipe dry.

Step 8: Wash windows and window treatments

Wash windows using a vinegar solution and a lint-free cloth. Pay attention to corners and edges. Dust or vacuum window treatments, such as blinds or curtains, or follow the manufacturer’s instructions.

Step 9: Focus on the floors

Vacuum or sweep the kitchen floor to remove loose debris. Then mop with your favorite floor disinfectant, depending on the type of flooring you have. Pay attention to corners and edges, and allow to dry completely.

Step 10: Final touches

Put everything back in its designated place, ensuring that cabinets and drawers are organized. Add finishing touches like fresh flowers or scented candles to enhance the overall ambiance of your clean and fresh kitchen.

Where can I find a dependable cleaning and disinfecting service in La Mirada, CA?cleaning disinfecting la mirada ca

When you want to properly disinfect your children’s toys or you’re looking for the best way to take care of your home, experts from Oasis Natural Cleaning have all the answers to your questions. We boast a team of highly trained and experienced specialists who use proven methods and first-rate supplies to ensure your home sparkles. Whether you live near Biola University or another nearby neighborhood, all you need to do is give us a call today! 

Top Tips to Clean Your Windows Like a Pro

Posted by | Household Tips | No Comments

How do I get streak free windowsWashing your windows can be a daunting task, but with the right techniques and tools, you can achieve sparkling, streak-free results like a professional. When you properly take care of them, they not only enhance the overall appearance of your home but also allow more natural light to enter, creating a brighter and inviting atmosphere. 

While a reliable cleaning and sanitizing service in La Mirada, CA can efficiently tackle this for you, having a couple of pro tips at hand is always useful. In this guide, we’ll explore top tips and tricks to help you clean your windows like a pro

How do I get streak free windows?

From selecting the right solutions and tools to using proper techniques, these expert strategies will enable you to achieve pristine windows that will impress even the most discerning eye:

Gather the necessary tools 

Start by gathering all the tools you’ll need for the task. These typically include a squeegee, microfiber or lint-free cloth, a bucket, window solution, and a scrubber or sponge.

Select the right solution

Avoid using regular household products that are ammonia-based as they can leave streaks or residue. Opt for a professional window solution or create your own by mixing equal parts water and white vinegar or water and mild dish soap. Alternatively, there are commercial sprays available that are specifically formulated for streak-free results.

Choose a cloudy day

Washing your windows on a sunny day can cause the solution to dry quickly, leading to streaks. It’s best to choose a cloudy or overcast day to ensure that the product has enough time to work before drying.

Start with dry cleaning

Before applying the solution, remove any loose dirt, dust, or cobwebs from the window surface. Use a dry microfiber cloth or a brush attachment on a vacuum cleaner to gently remove debris.

Apply the solution

Dip your scrubber or sponge into the solution and squeeze out any excess liquid. Start from the top and work your way down, applying it to the entire window surface. Be thorough but avoid excessive soaking, as too much liquid can lead to streaks.

Use the squeegee

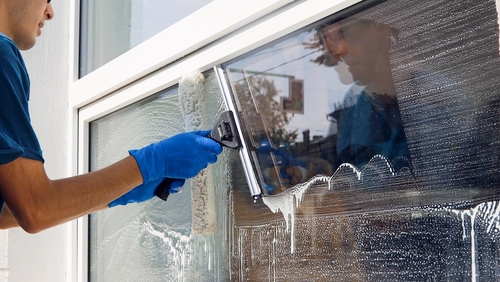
The squeegee is a key tool for achieving streak-free windows. Starting from the top corner, pull it across the window in a straight, horizontal motion, overlapping each stroke slightly. Wipe the blade with a clean, lint-free cloth after each pass to remove excess water.

Wipe away excess moisture

After using the squeegee, wipe any remaining moisture from the edges and corners of the window using a clean microfiber or lint-free cloth. This will help prevent water from dripping down and causing streaks.

Tackle stubborn spots

If you encounter stubborn stains or marks, apply a small amount of your solution directly to the spot and gently scrub with a soft brush or sponge. Rinse the area with clean water and squeegee as usual.

Pay attention to the window frame

Don’t forget to take care of the window frames and tracks. Use a damp cloth or sponge with the solution to wipe away dirt and grime. Dry the frames thoroughly to prevent streaks or water damage.

Double-check for streaks

After completing the entire process, inspect the windows from different angles and lighting conditions to ensure there are no streaks or residue. If you notice any streaks, use a clean, dry cloth to buff them away gently.

Who provides comprehensive cleaning and sanitizing service in La Mirada, CA?

cleaning sanitizing service la mirada ca

When your kitchen needs a thorough clean up, you need a safe way to take care of your kid’s toys, or you just want an efficient way to declutter your space, feel free to reach out to Oasis Natural Cleaning. Our experienced team will be happy to answer any questions you may have and provide you with outstanding results that ensure your utmost satisfaction. Whether your home is in La Mirada or in another nearby area, we’ll be there to help. Call today! 

Your Ultimate Guide to Spring Cleaning

Posted by | Uncategorized | No Comments

What should be included in spring cleaningSpring has finally arrived, and it’s time to open up the windows, let in the fresh air, and give your home a thorough seasonal revamp. If you hire a proven maid service in Whittier, CA to take care of your residence, it will not only make your place sparkle but also help you maintain a healthy living environment where the whole family can thrive and enjoy.

In this blog post, we will discuss the essential tasks that should be included on every proper spring cleaning checklist to ensure your residence is healthy, reinvigorated, and polished up to the highest standards.

What should be included in spring cleaning?

Spring cleaning is a time-honored tradition that helps you refresh and revitalize your property. By following this ultimate sprucing-up checklist, you’ll be well on your way to a sparkling home that’s ready to provide comfort and repose in the warmer months ahead.

Declutter and organize

The first step in any successful spring cleaning is decluttering and organizing your living space. Go through each room, closet, and drawer, and decide what you should keep, donate, or discard. Once you’ve sorted through your belongings, find a place for everything and organize your living space, making it more functional and enjoyable for you and your loved ones.

Windows and window treatments

Spring is the perfect time to tend to your windows inside and out and wash or dust window treatments. Use a glass washing fluid and a microfiber cloth to remove streaks, and don’t forget to address the window sills and tracks. For window treatments, follow the manufacturer’s instructions for proper care to avoid damage to sensitive parts.

Walls and baseboards

Dust and grime can accumulate on walls and baseboards, so keep in mind that they need to be cleaned thoroughly. Use a damp cloth or sponge with mild soapy water to gently scrub or wipe the surfaces, making sure to pay attention to the corners. 

Flooring

Give your floors some TLC by thoroughly sweeping, vacuuming, and mopping. For carpets, consider hiring professionals or renting a carpet cleaning machine to achieve the best results and avoid abrasive chemicals. For hard floors, ensure you’re using the appropriate fluid for the specific material (e.g., hardwood, tile, or laminate) to increase its longevity and bring out its best features.

Kitchen deep clean

Spring is a great opportunity to do a complete job in your kitchen. This includes tackling the inside of your oven, microwave, and refrigerator, as well as sanitizing your countertops, sink, and cutting boards. Don’t forget to wipe down your cabinets, organize your pantry, and degrease your stove hood.

Bathroom refresh

Give your bathroom a thorough scrub, focusing on the shower, bathtub, toilet, and sink. Remove any buildup of soap scum or hard water stains, and use a disinfectant to kill germs and bacteria. Additionally, wash or replace your shower curtain and bath mat as needed.

Bedding and upholstery

Spring is an ideal time to wash or dry clean your bedding, including mattress pads, comforters, and pillows. Rotate and flip your mattress to ensure even wear and increase its lifespan. Vacuum your upholstery and spot-clean any stains on your furniture.

Outdoor areas

Don’t forget to include your outdoor living spaces in your spring cleaning routine. Take care of your patio furniture, sweep your deck or patio, and power wash your home’s exterior if needed. Be sure to unclutter your gutters and downspouts to prevent flooding, surges, and water damage.

Replace filters and batteries

Spring cleaning is the perfect time to replace or wipe down the filters in your heating, ventilation, and air conditioning (HVAC) system. Additionally, check and replace batteries in your smoke and carbon monoxide detectors to ensure they are functioning correctly.

Create a maintenance plan

After you’ve completed your spring cleaning, take the time to create a maintenance plan for the rest of the year. This can include tasks such as regular smartening up, home repairs, and seasonal maintenance to help keep your abode in top shape.

Where in Whittier, CA can I find a reliable maid service provider?whittier ca maid service

After the arduous winter has gone and the weather is stabilized, spring is the perfect time to hire professionals to thoroughly spruce up your abode, tackle stainless steel surfaces in your kitchen, and schedule recurring appointments to keep your house in optimal condition throughout the year

Take advantage of the beautiful spring days to engage in fun outdoor activities with your loved ones in the Puente Hills while our technicians are applying their magic touch and refreshing your home to give your entire family a fresh start. Call us today!

7 Benefits of Professional Maid Service

Posted by | Uncategorized | No Comments

maid service whittierIn today’s fast-paced world, striking a balance between work, family, and social life can be challenging. With a constant stream of chores and responsibilities, it’s easy to feel overwhelmed. 

Enter professional maid services in Whittier – an ideal solution for maintaining a tidy and organized living space. Investing in an experienced domestic help offers numerous benefits, including a healthier home environment, time-saving convenience, and increased productivity.

By outsourcing your tasks, you can enhance your quality of life, achieve a better work-life balance, and enjoy the many advantages of a polished and organized residence. This blog post will explore the top benefits of hiring trustworthy specialists, from improved health to increased productivity. Keep on reading below!

What are the benefits of having a maid service?

Even if you think there is no reason why you shouldn’t take care of this job yourself, remember that the next time you may not have the free time or the enthusiasm needed to pull off the feat. On the other hand, specialists are trained to maintain a high level of service and deliver each and every time. Entrust your sprucing up to experienced technicians and reap the following benefits.

Healthier home environment

One of the most significant advantages of having pros at the helm is the creation of a healthy and refreshed living space. Professionals are equipped with the knowledge and tools to eliminate harmful allergens, bacteria, and viruses, ensuring that your house stays clean and germ-free. This is particularly beneficial for those who suffer from allergies, asthma, or other respiratory issues.

Time-saving convenience

Hiring professionals frees up valuable time, allowing you to focus on more important tasks, hobbies, or spending quality time with loved ones. If you delegate your cleaning, you can allocate your time and energy to other aspects of your life, such as career growth, personal development, or relaxation.

Consistent and high-quality results

Expert technicians are trained to scrub your home thoroughly and efficiently, providing consistently high-quality results. Their expertise ensures that every nook and cranny of your residence is spotless, leaving you with a fresh and inviting living space.

Customized plans

The best cleaning service providers offer customizable tidying up plans tailored to your specific needs and preferences. Whether you require a deep clean, bi-weekly maintenance, or assistance with specific tasks like window wiping or carpet shampooing, professionals can accommodate your unique requirements.

Cost-effectiveness

While it may seem counterintuitive, hiring a specialist team can save you money in the long run. If you hire pros to spiff up your residence, you eliminate the need to purchase expensive supplies and equipment. Additionally, regular maintenance from a professional service can prevent costly repairs caused by neglect, such as mold growth or damaged flooring.

Reduced stress

A cluttered, disorganized living space can contribute to increased stress levels. By enlisting the help of skilled cleaners, you can maintain a clean and orderly home, creating a more relaxing and peaceful environment. This can have a positive impact on your overall mental well-being and stress management.

Increased productivity

A decluttered and organized home has been shown to boost productivity levels. By outsourcing your tasks to professionals, you can enjoy a well-maintained living space conducive to focus, creativity, and efficiency. This will lead to an improved well-being in your personal life and increase the possibility of career advancement down the line.

Who can I turn to for dependable maid services in Whittier, CA, and the surrounding area?What are the benefits of having a maid service

If you need someone to polish your stainless steel surfaces or you want to greet the warmer season with a thorough spring cleaning, Oasis Natural is your go-to option for all types of deep and intensive spruce up solutions.

Whether you are located by the Pio Pico State Historic Park or near the foothills area, don’t wait – consider hiring a reputable specialist and experience the difference it can make in your life. Get in touch with us today!

6 Efficient Ways to Clean Stainless Steel

Posted by | Uncategorized | No Comments

How do you clean stainless steel kitchen surfacesStainless steel is a popular choice for kitchen appliances and fixtures due to its sleek appearance and durability. However, despite its name, it’s not completely resistant to stains and marks. In fact, it can be quite challenging to maintain its shine and luster over time. The good news is that there are several efficient ways to take care of it and restore its original shine without damaging the surface. 

Whether you’re dealing with stubborn stains or just looking for routine maintenance, hiring a reliable company in Whittier that provides deep cleaning services can be a great solution, but it’s also useful to learn about the techniques and products available to perform this process on your own. Let’s explore some efficient ways to maintain your stainless steel.

How do you clean stainless steel kitchen surfaces?

Whether you want to restore shine to your stainless steel sink, appliances, or other surfaces around your home, the following tips will help you on your way:

Warm water and soap

The simplest way to maintain stainless steel is to use warm water and a gentle dish soap. Begin by wiping down the surface with a damp cloth to remove any loose dirt or debris. Then, mix a small amount of dish soap with warm water and use a soft cloth or sponge to wipe the surface in circular motions. Rinse thoroughly with and dry with a clean, dry cloth.

Baking soda and vinegar

Sprinkle baking soda onto a damp cloth and rub it onto the surface in a circular motion. Then, apply a small amount of white vinegar onto the cloth and continue to rub. The vinegar and baking soda will react together, creating a bubbling effect that helps to lift stains and grime. Rinse thoroughly and dry with a clean cloth.

Olive oil

Olive oil is an effective and natural way to polish stainless steel. Begin by wiping down the surface with warm water and a gentle dish soap as mentioned above. Then, apply a small amount of olive oil onto a soft cloth and rub the surface in circular motions. This will help to remove any remaining stains or marks and leave the surface with a shiny finish. Use dry cloth to buff the surface and remove any excess oil.

Glass cleaner

Glass solution is a quick and easy way to maintain your stainless steel. Begin by spraying a small amount onto the surface and use a soft cloth or paper towel to wipe it down in a circular motion. This will help to remove any fingerprints, smudges or water marks. Rinse thoroughly and dry with a cloth.

Club soda:

Club soda is another surprising solution for stainless steel. Pour a small amount of it onto a soft cloth and rub the surface. The carbonation in the club soda helps to break down any stains or marks. Rinse thoroughly and dry.

Commercial stainless steel product

If none of the above solutions work, you can try one of the commercial stainless steel products. They are specifically formulated to clean and polish this material without causing any damage. However, it’s important to follow the manufacturer’s instructions carefully and to test it on a small, inconspicuous area first.

whittier deep cleaningWhere in Whittier can I hire detailed deep cleaning?

Whether your home is in need of a spring clean, you want to thoroughly clean your living room, or you wonder why hiring a professional is a good idea, Oasis Natural Cleaning is here to answer all your questions and ensure your home receives the treatment it deserves. Our reliable team of committed and experienced technicians uses top-notch tools and supplies to ensure optimal results. Treat yourself to a shopping day at the Whittwood Town Center while we take care of your chores. Give us a call today! 

Deep Clean Your Living Room Like a Pro

Posted by | Uncategorized | No Comments

 How do I deep clean my living roomYour living room is a place where your family and friends come together to relax and spend some quality moments. However, over time, dust, dirt, and clutter can accumulate, leaving your space feeling less inviting and cozy. 

Deep cleaning your space in Whittier, CA on a regular basis is essential to create a more comfortable and pleasant living environment and keep it that way. With the right approach, tools, and tips, you can do it in an easy and effortless manner and quickly enjoy the results of your work. Check out some expert tips and tricks on how to deep clean your living room like a pro.

How do I deep clean my living room?

While it may be difficult to embark on this venture, the following plan will help you do it more efficiently while ensuring every corner gets disinfected:

Step 1: Declutter

The first step is to declutter. Remove any items that don’t belong in the room, such as dishes, clothes, or toys. Go through your furniture, and remove any unnecessary items such as magazines, books, or knick-knacks that are just collecting dust. Take a critical look at your furniture and decide if there’s anything that you no longer use or need. If so, consider donating or selling it.

Step 2: Dusting

Now that your living room is decluttered, it’s time to start dusting. Start from the top of the room and work your way down. Dust the ceiling, ceiling fans, light fixtures, and crown molding with a microfiber duster. Then, move onto your furniture and decor. Use a microfiber cloth to wipe down your tables, shelves, and decorative items. Be sure to tackle both the tops and the sides of the furniture. Don’t forget your blinds, curtains, and windowsills as well.

Step 3: Vacuuming

The next step is to vacuum the floors and furniture. Use an attachment to get in all the nooks and crannies of your furniture, and don’t forget to vacuum under and behind the couches and chairs. Be sure to use the crevice tool to clean along the baseboards and in the corners of the room. If you have a lot of pet hair, consider using a rubber broom or a lint roller to remove it from your furniture.

Step 4: Carpets

If you have carpet in your living room, it’s a good idea to give it a thorough scrub. You can rent a carpet cleaner from your local home improvement store, or you can hire professionals. Be sure to move any furniture out of the way before you start. Follow the manufacturer’s instructions and be sure to allow enough time for the carpet to dry before you move your furniture back in place.

Step 5: Upholstery

If you have upholstered furniture, you can use a steam cleaner to take proper care of it. Be sure to test a small, inconspicuous area first to make sure that the solution doesn’t damage the fabric. Follow the instructions, and be sure to allow enough time for the furniture to dry before you use it again.

Step 6: Floors

For your hardwood or tile floors, use a damp mop, being careful not to use too much water, which can damage them. You can also use a steam mop for a more thorough disinfection. If you have a lot of grime buildup on your floors, consider using a specialized product designed for your flooring type.

Step 7: Final touches

Now that your living room is spotless, it’s time to add some final touches. Replace any burnt-out light bulbs, add some fresh flowers or plants, and add some new throw pillows or a cozy blanket to your couch. Take a step back and admire your hard work!

deep cleaning whittier caWho provides comprehensive deep cleaning in Whittier, CA?

When you want to give your home a thorough spring clean, properly take care of your stainless steel surfaces, or learn more about the benefits of hiring pros, reach out to Oasis Natural Cleaning. We boast an experienced team of dedicated and skilled professionals who are always ready to go the extra mile and ensure your utmost satisfaction. Enjoy the beauty of the Greenway Trail and let our experts do the rest. Call now!

Oven Cleaning Made Easy

Posted by | Uncategorized | No Comments

Although it may seem that freeing your oven from grime and dirt is a never-ending task that you are reluctant to do, it doesn’t have to be that way. All you need to do is master a few tricks that will make oven cleaning a breeze.

Nonetheless, perfecting your technique takes some time, which is why you should consider asking reputable residential home cleaners in Whittier for assistance. This article will provide you with some useful tips on how to clean your oven easily. Read on!

What is the best way to clean the inside of an oven?

What is the best way to clean the inside of an ovenCleaning the kitchen, including the oven is one of the essential move-out cleaning tips for sellers. While you may think that using a self-cleaning function will suffice, unfortunately, that’s not the case. However, with good organization, you can do wonders in a short period of time. Here’s what you need to do:
1. Remove and soak the racks

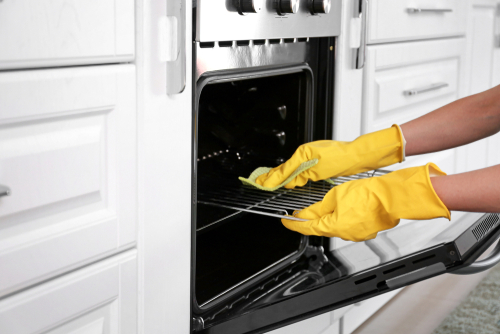
The best way to clean the racks is to remove them and soak them in hot water with diluted dishwashing liquid. The bathtub may be the best place for soaking, just make sure to wash it after use. Leave the racks in the tub for two hours to dissolve the grease and scrub them with a stiff brush. Rinse them with clean water to remove the residue and dry them before you put them back in the oven.

2. Scrub the inside

Similar to deep cleaning a refrigerator, you can make a DIY cleaning agent. Mix baking soda, vinegar, and warm water to make a paste. Apply the paste to the surfaces covered with grease and let it sit for half an hour so that the ingredients can dissolve the baked-on food. 

Use a scrunched-up ball of foil, or a ceramic hob scraper to scrub off the food leftovers. Wipe the oven interior with a damp cloth to remove the residue. If you opt for an industrial cleaning agent make sure to wear gloves and a face mask, as many oven cleaners contain hazardous substances.

3. Free the door from grime

Use the same principle as with the inside of the oven. Apply a bicarbonate and water paste to the cooked-on food, and remove it with a spatula after 20 minutes. Wipe the door with a clean cloth. Don’t forget to wipe down the door knob. Avoid spraying the cleaner directly onto the knob. Spray the rag and rub the controls to prevent shorting. Since this is a delicate operation, you may want to switch up tasks and get your spouse to help with housework.  

4. Keep the oven clean

If you want to reduce the time you spend scrubbing the oven, you should try to make it less dirty. Use oven liners and line the base of the oven with a piece of foil or easy-clean oven sheets. Obtain roasting bags for meat, fish, and vegetables. This way you’ll protect the oven from spills, splatters, and greasy fumes during cooking. Remove the tray when you want to check the progress of the food you’re cooking to avoid grease dripping.

Which residential home cleaners in Whittier are the top choice? 

Which residential home cleaners in Whittier are the top choiceIf you want to have a spotless oven, and have the time for something other than scrubbing, You need to look no further than Oasis Natural Cleaning. Our experienced specialists will make your oven and your home sparkling. We use solely products that are safe for people and the environment. 
Spend some quality time with your friends and family and go on a sightseeing tour of Whittier while our reliable staff deals with every nook and cranny of your home. We are only a phone call away!

Easy Fridge Cleaning Guide

Posted by | Uncategorized | No Comments

As housekeeping goes, fridge cleaning is one of the most formidable tasks of them all. One of the reasons why it’s so time-consuming is the fact that most people don’t do it so often and when they do decide to tackle this chore, there’s a lot of caked on-dirt and spills to tackle. 

This is especially the case if you’re moving into a new home that already has a fridge in it that hasn’t been tidied up in awhile. While most people in Whittier prefer to outsource this task to reliable house cleaning services, it’s still well-worth a homeowner’s while to learn how to do it on their own. 

In the following article, we’ll show you how to take your fridge cleaning – and your food safety – to the next level by providing an easy guide on how to make your refrigerator shine. Read on!

Do I need to turn off the fridge to clean it?

Do I need to turn off the fridge to clean itAbsolutely! Water and electricity are never a good combination as you can get electrocuted. Make sure to turn off the fuse or circuit breaker and unplug the fridge. Putting down towels to protect the floor from spills is also advisable. Preparation is an essential step and should be incorporated into a clean-up plan, which is one of the ways to get your spouse to help you with housework.

How do you deep clean a refrigerator?

Once you’re done with preparation, you need to follow a couple of simple steps:

Step #1: Remove food

One of the best move-out cleaning tips is to get rid of leftovers. Check the dates on every food package and throw away everything that’s expired. Consider tossing the food that’s close to the expiration date and that you know you won’t be using any time soon. Put the groceries in a cooler to keep them fresh and sanitary until you finish cleaning.

Step #2: Wash shelves and salad crisper drawers

Take out salad crisper drawers and all removable shelves. Check the user manual beforehand to avoid damaging them. Let the drawers and shelves reach room temperature to reduce the risk of shattering and soak them in the solution of hot water and washing liquid. Scrub and rinse them with clean water and let them dry. Use a toothpick to remove the dirt accumulated on the joint between the shelf surface and its surround.

Step #3: Clean up the interior

Wipe the interior with a damp microfiber cloth to remove the hard dust and scrub with a sponge to get rid of dirt and grime. Similar to cleaning the interior of an oven, it’s effective to make a paste from water and baking soda. Apply the paste to the surface, let it sit for 20-30 minutes, and remove it with a clean cloth. This way you’ll also disinfect the fridge.

Step #4: Make the outer surfaces sparkling

Wash the handle and the door to remove the germs that build up from frequent contact with hands. If you have a fridge with a freezer at the bottom, use the crevice vacuum nozzle to pick up the crumbs that have accumulated in the folds of the door seal, or use a stiff, dry washing-up brush.

Step #5: Tackle the coils

How do you deep clean a refrigeratorUse the vacuum cleaner to remove the dust from the condenser coils at the back of the fridge. Coils should be cleaned once or twice a year to keep the fridge running efficiently and to prevent them from becoming clogged, especially if your kitchen is full of dust or pet hair.

Where in Whittier can I find dedicated house cleaning services? 

Making your fridge spick-and-span doesn’t have to be an impossible mission. Luckily, Oasis Natural Cleaning is here to help you. Our committed experts provide an array of cleaning services and use eco-friendly products.

Savor an exhibition at Whittier Art Gallery while we whip your home into an immaculate condition. Book our services today!

Request a cleaning in just 60 seconds Cleaning Estimate